Table of contents
- Introduction ✨
- Key Features of Ryform 🚀
- User-Friendly Dashboard: Each user gets a dedicated dashboard, where they can create, manage, and monitor their forms. The dashboard provides a clear overview of form titles, creation dates, and direct links to each form.
- Custom Form Creation: Ryform gives you the freedom to design forms exactly how you envision them. You can add as many fields as needed and customize their appearance and behavior.
- Shareable Form Links: Once you've created your form, Ryform generates a shareable link that you can easily distribute to users or customers. This link grants access to your form, making it convenient for collecting responses.
- Data Storage: Form submissions are securely stored in a PostgreSQL database connected to Supabase, providing a reliable and efficient data storage solution.
- Data Visualization with Outerbase: Ryform leverages Outerbase, an advanced database interface, to visualize, edit, update, and delete form submission data. It offers a user-friendly way to work with your data.
- Authentication and Themes: Ryform offers full login and signup authentication for users. Additionally, the application supports both dark and light themes, ensuring a comfortable user experience.
- Building Ryform: A Journey Through Development 🛠️
- How to use Ryform
- Demo Video
- What is Outerbase & Why Use Outerbase?
- Connecting Postgres Database to Outerbase
- The Code
- Lessons Learned
- Future Plans
- Conclusion
- Some Useful Links
Introduction ✨
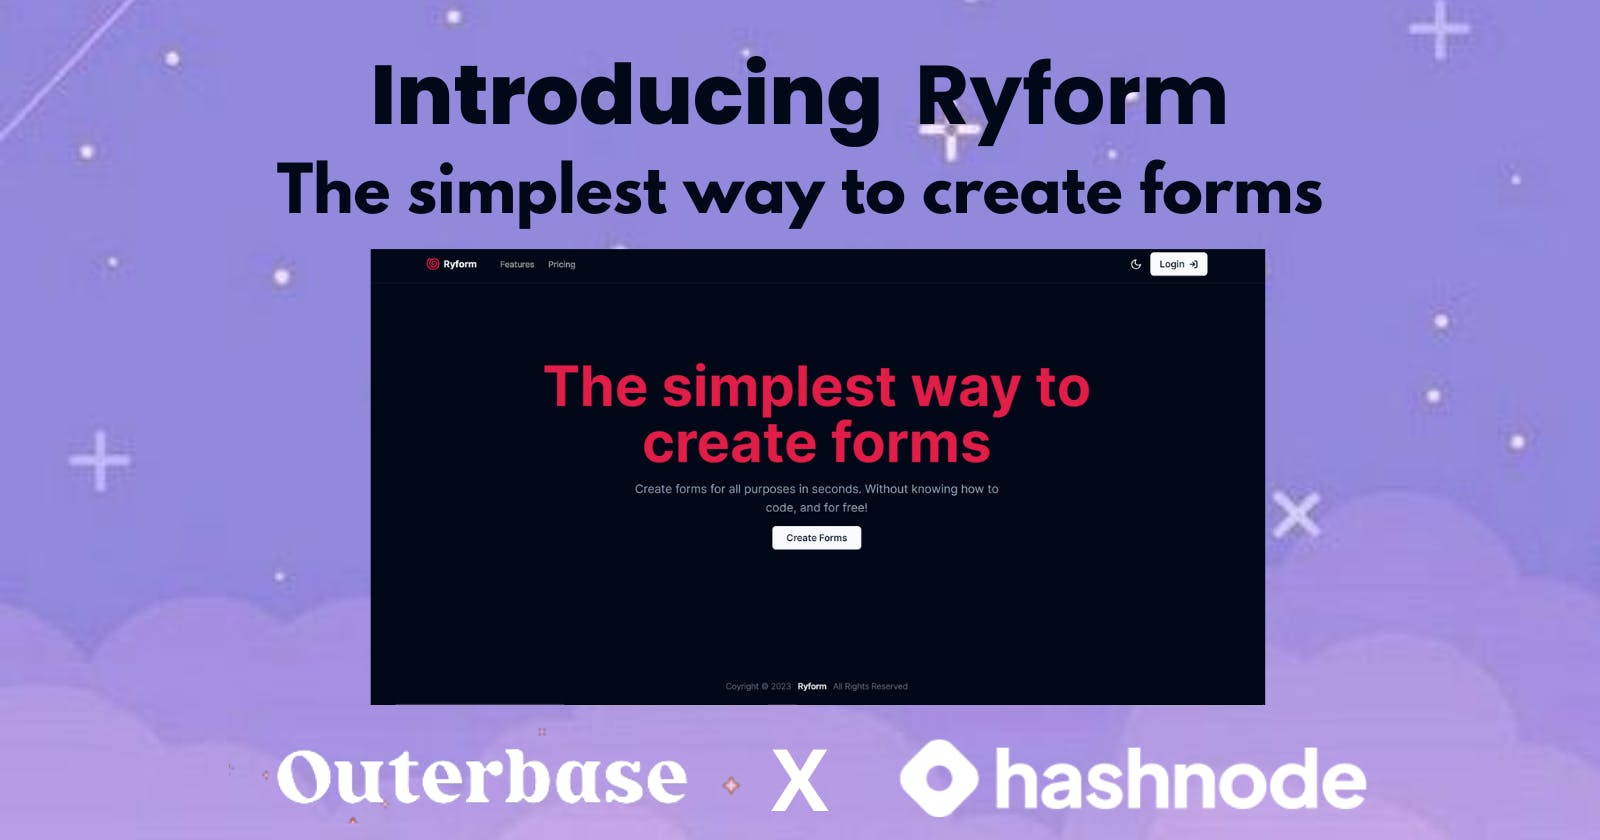
In this article, we'll delve into the world of Ryform, exploring its key features, innovative technology stack, and the challenges overcome during its development. Join us as we introduce you to a powerful tool that's changing the game of form building.
Ryform is a web application that empowers users to create custom forms tailored to their specific needs. Whether you're collecting customer feedback, conducting surveys, or gathering data for research, Ryform simplifies the process. The primary goal of Ryform is to provide users with a versatile platform for effortlessly building and sharing forms.
Demo Credentials to Test and Play around web app
Email: user@test.com and Password : test1234

Moblie View

I built this web app using Next.js, Tailwind CSS, and Outerbase (an advanced database interface, to visualize, edit, update, and delete data.)
To know more visit Outerbase If you haven't started your Hashnode Blog, then what are you doing, visit Hashnode.com and start your Tech blog today.
Key Features of Ryform 🚀
User-Friendly Dashboard: Each user gets a dedicated dashboard, where they can create, manage, and monitor their forms. The dashboard provides a clear overview of form titles, creation dates, and direct links to each form.
Mobile Responsive : Complete Mobile Responsive with better UI/UX design.
Custom Form Creation: Ryform gives you the freedom to design forms exactly how you envision them. You can add as many fields as needed and customize their appearance and behavior.
Shareable Form Links: Once you've created your form, Ryform generates a shareable link that you can easily distribute to users or customers. This link grants access to your form, making it convenient for collecting responses.
Data Storage: Form submissions are securely stored in a PostgreSQL database connected to Supabase, providing a reliable and efficient data storage solution.
Data Visualization with Outerbase: Ryform leverages Outerbase, an advanced database interface, to visualize, edit, update, and delete form submission data. It offers a user-friendly way to work with your data.
Authentication and Themes: Ryform offers full login and signup authentication for users. Additionally, the application supports both dark and light themes, ensuring a comfortable user experience.
Building Ryform: A Journey Through Development 🛠️
Building Ryform, a versatile custom form-building web application, was a journey that unfolded in two distinct but interconnected phases: frontend and backend development. Each phase brought its unique challenges, creative solutions, and moments of revelation. Let's delve into this journey, starting with the frontend.
Frontend Part - UI/UX Design With Next.js, Tailwind CSS & Shadcn UI Library
The front-end development of Ryform kicked off with an emphasis on designing an intuitive and visually appealing user interface. User experience was at the forefront of our priorities, so we leveraged the power of Next.js and React.js to create a seamless, responsive, and user-friendly interface along with Tailwind CSS and Shadcn UI library, to make the UI/UX better.
Backend Part - Outerbase with Postgres
The backbone of Ryform's backend is the PostgreSQL database, integrated seamlessly with Outerbase. However, transitioning from NoSQL to PostgreSQL posed a learning curve. I overcame this by diving deep into PostgreSQL's capabilities and harnessing the power of Postgres with Outerbase's intuitive dashboard interface for data visualization for efficient data storage.
How to use Ryform
Visit Ryform: Start your journey by visiting ryform.vercel.app.
Sign Up: Click the "Sign Up" button to create your Ryform account. Fill in your details and hit "Sign Up."
Email Confirmation: Check your email for a confirmation link. Click on it to verify your account.
Log In: Return to the Ryform website and log in with your newly created account.
Dashboard: After logging in, you'll find yourself on the Dashboard. This is where you can manage all your forms.
Create a New Form: Click the "Create New Form" button at the top of the Dashboard. You'll be redirected to a new form creation page.
Form Creation: Ryform provides you with a variety of input blocks to create your form, including text, textarea, time, date, URL, number, phone number, and email. Arrange these blocks to build your custom form.
Publish Your Form: Once you've designed your form, hit the "Publish" button to save its schema in the database. This schema will be used to create a dynamic form that users can fill out.
Share Your Form: After publishing, you'll receive a unique link for your form, which looks like this: https://ryform.vercel.app/r/formId. Share this link with anyone you want to collect responses from.
Collect Responses: When someone accesses your form link and fills it out, the data will be saved in the database.
Dashboard Updates: The form submission data will also be visible in your Dashboard, presented in a table format for easy review.
Demo Video
What is Outerbase & Why Use Outerbase?

Outerbase is a web-based database management system that simplifies the entire database management process.
It serves as a bridge between your database and your applications, offering an intuitive and visually pleasing interface for data management, exploration, and collaboration.
Think of it as the missing piece that transforms your database into a powerful tool for data-driven decision-making.
Key Benefits of Outerbase
Streamlined Data Management
Real-time Collaboration
Visual Data Exploration
Enhanced Security
Seamless Integration
The question of why to use Outerbase is simple: it empowers you to make the most of your data without the headaches typically associated with database management. Here's why you should consider using Outerbase:
Accessibility: Outerbase levels the playing field, allowing anyone in your organization to interact with data, regardless of their technical background.
Productivity: Say goodbye to tedious data management tasks. Outerbase streamlines the process, freeing up your team's time for more valuable work.
Insights: With its data visualization tools, Outerbase helps you uncover valuable insights from your data, empowering better decision-making.
Collaboration: Real-time collaboration fosters innovation and efficiency, ensuring that your team is always on the same page.
Security: Your data is safe and secure, giving you peace of mind as you work with sensitive information.
Connecting Postgres Database to Outerbase
Outerbase Workspace: Begin by creating an Outerbase workspace.

Accessing Your Dashboard: After creating the workspace, you'll be directed to your dashboard. Here, you'll find an option to connect a database. Click on it to proceed.

Creating a New Base: You'll be prompted to create a new base. If you're connecting an existing database, select this option. Choose your database type; for instance, if you're using PostgreSQL, select that option and click "Continue."
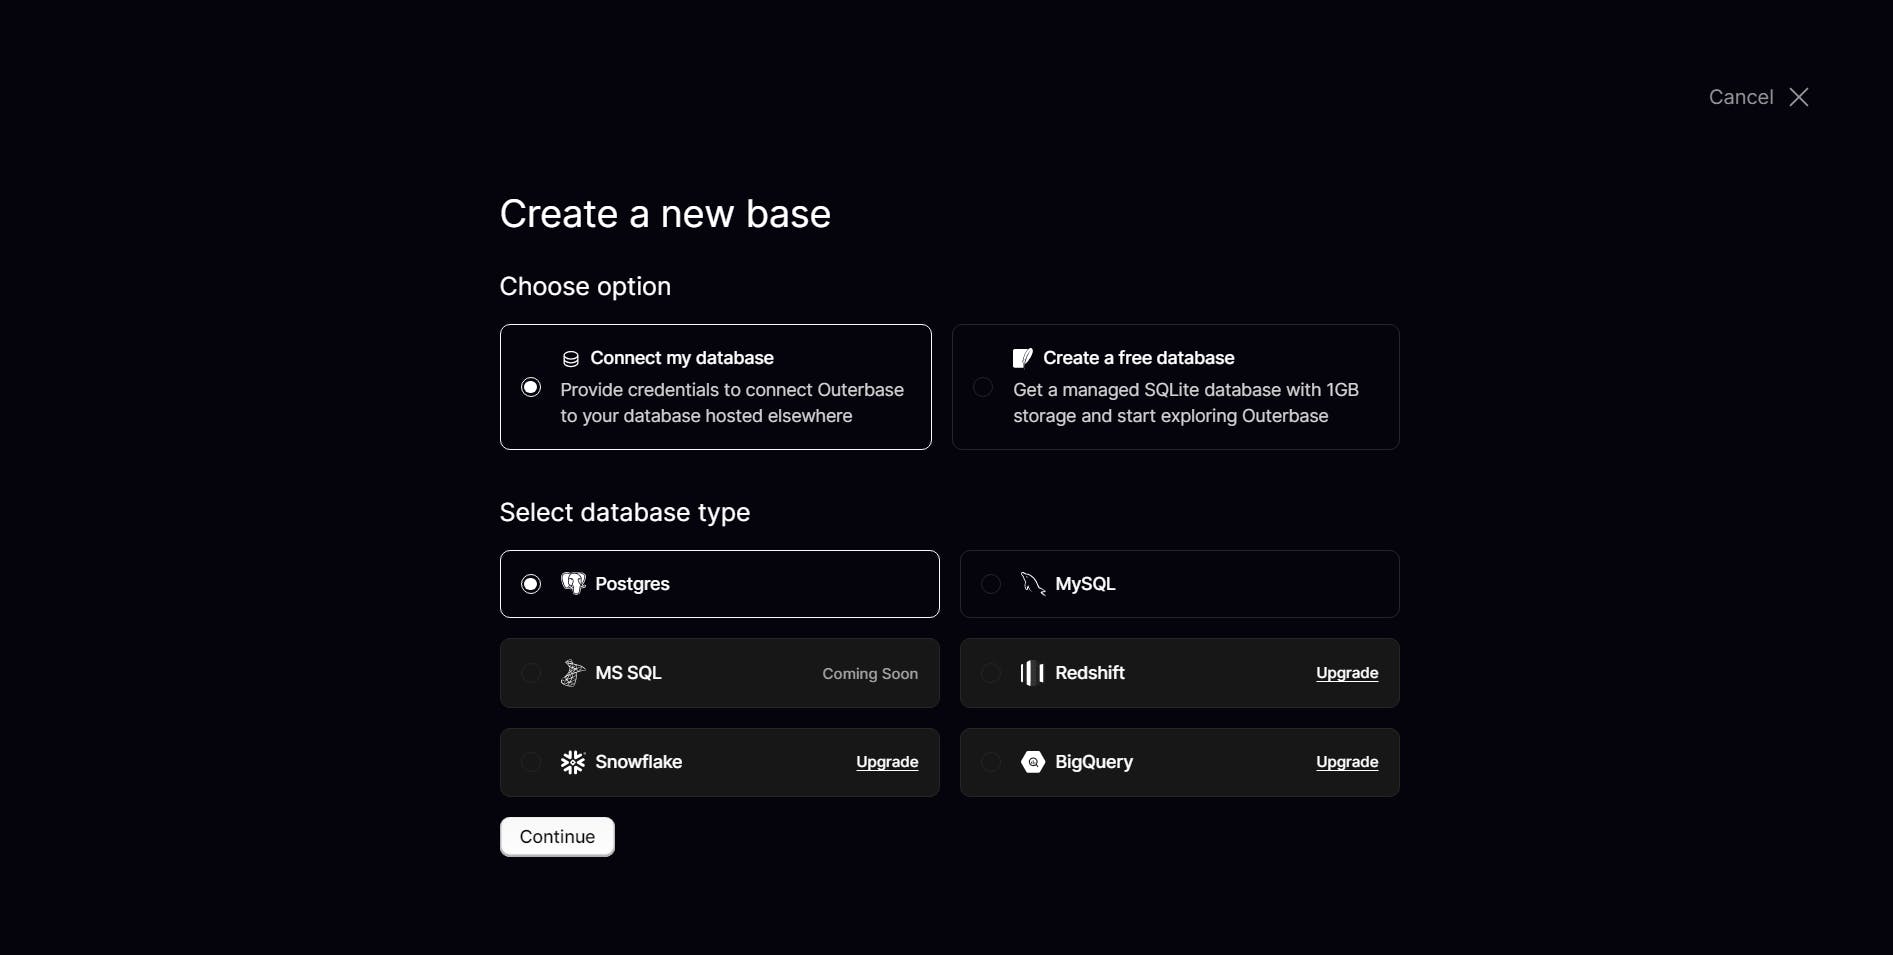
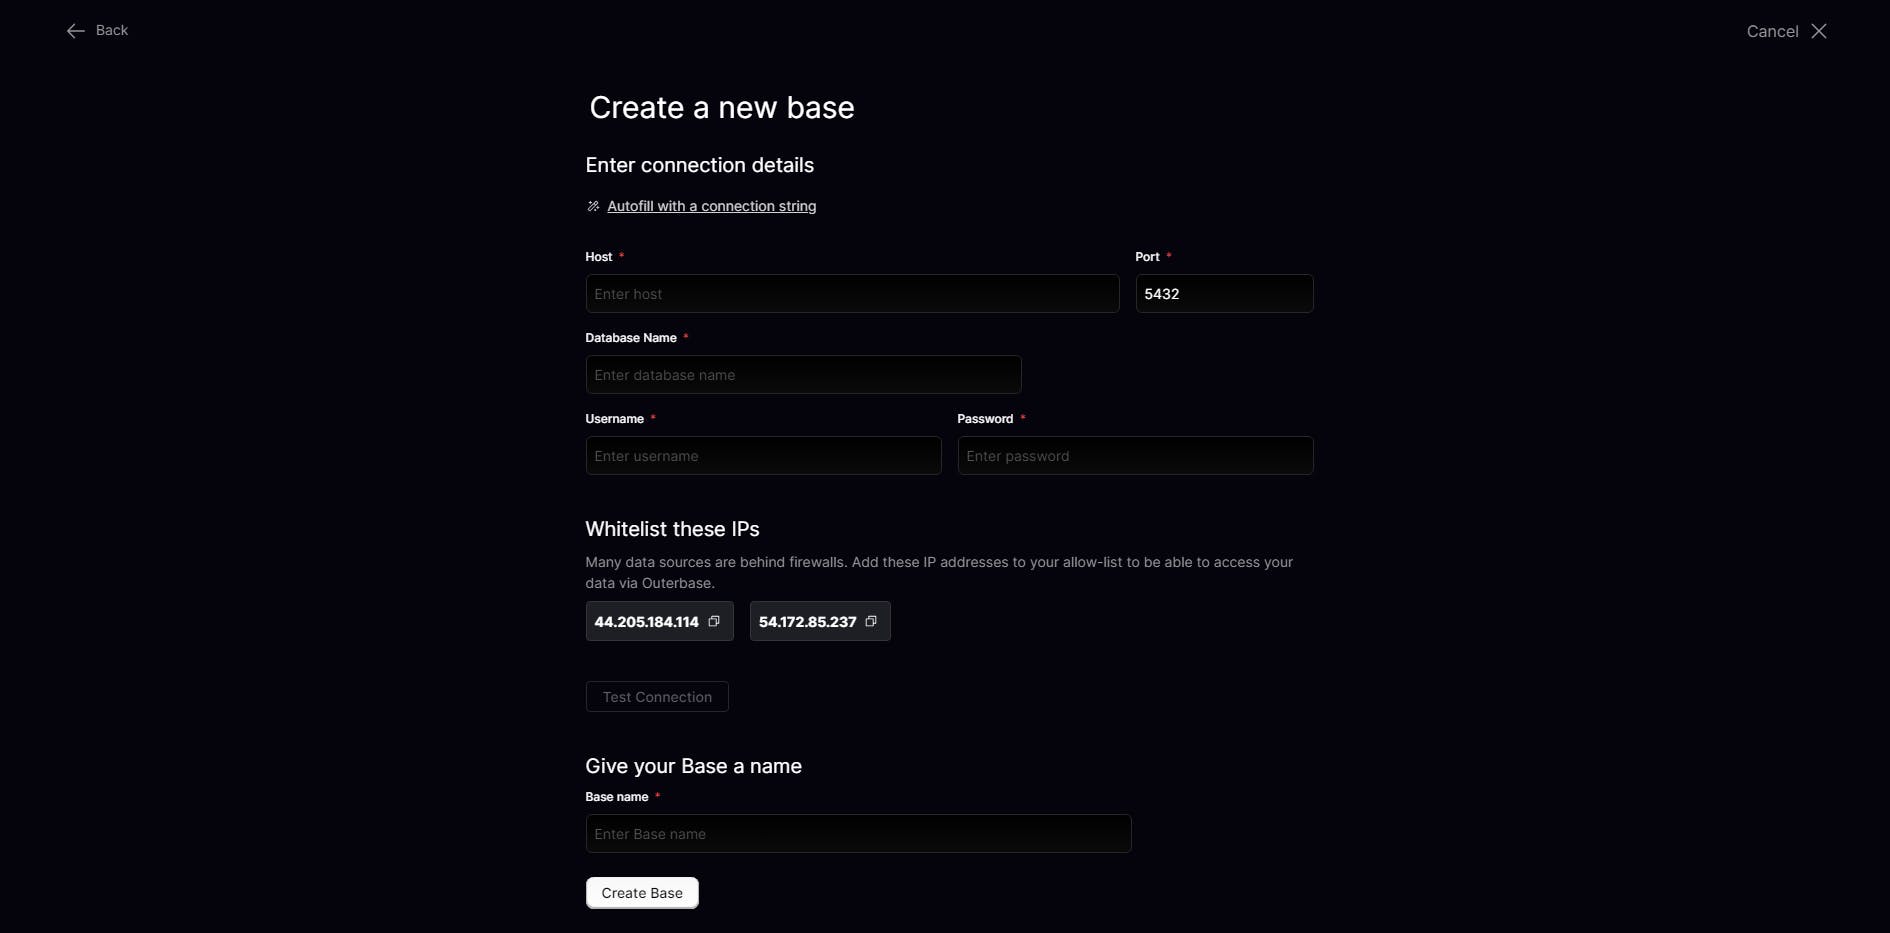
Enter Connection Details: Now, provide the connection details for the database you wish to connect. Click the confirmation button and patiently wait as Outerbase creates your new base.
Explore Your Dashboard: Once the base is created, you'll have access to your dashboards.
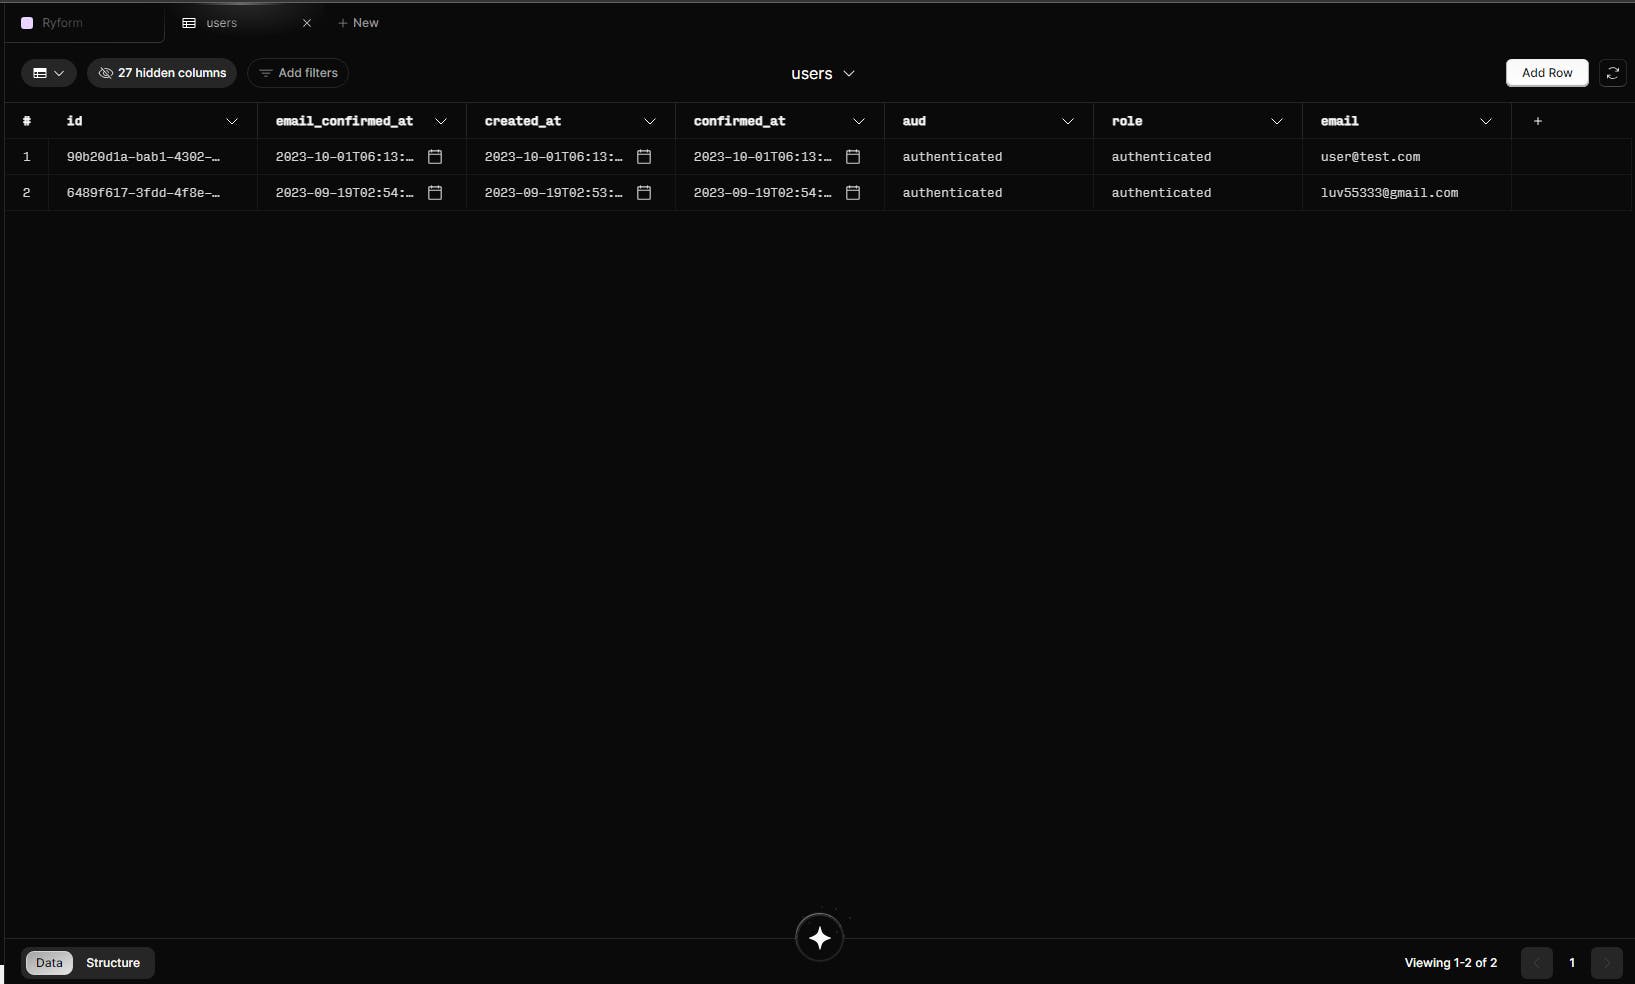
View Tables: Click on "View Dashboard" to explore the available tables. For instance, take a look on the below image it will look something like this.

The Code
You can get the code from my GitHub repository.
Steps to run the app locally:
Step-1: Git Clone the project
git https://github.com/raiv200/Ryform.git
Step 2: Install the dependencies
npm install
Step-3: Add the Environment Variables in the (.env ) File
First, create a (.env.local ) file in the root of the directory and add the following environment variables.
NEXT_PUBLIC_SUPABASE_URL=

NEXT_PUBLIC_SUPABASE_ANON_KEY=

SUPABASE_DB_PASSWORD=

SUPABASE_DB_USER=

SUPABASE_DB_PORT=

SUPABASE_DB_HOST=

SUPABASE_DB_DATABASE=

SUPABASE_ACCESS_TOKEN=
Step 4: Start the development server
Now open your project in your favorite IDE, (VsCode) and then start the development server.
npm run dev
Lessons Learned
Ryform was a solo project developed within a tight timeframe of 30 days. It was a labor of love, and every feature and line of code was crafted with care.
The journey of creating Ryform was filled with valuable lessons. Overcoming the challenges of working with PostgreSQL and building a complex application from scratch was a significant learning experience. It reinforced the importance of perseverance and continuous learning.
Future Plans
Looking ahead, Ryform's roadmap includes implementing an Edit feature for forms and allowing users to add Custom Logos to their forms. The project will continue to evolve and improve based on user feedback and emerging needs.
Conclusion
In conclusion, Ryform is a testament to the power of determination and innovation. It provides users with a versatile form-building solution that caters to their unique requirements.
With its user-friendly interface and commitment to excellence, Ryform is poised to make form creation and management a breeze.
I extend my heartfelt appreciation to Hashnode and Outerbase for organizing this hackathon.
This experience has been invaluable in broadening my skill set, particularly in the realm of database management and the exploration of Outerbase's capabilities. It was a truly enriching journey, merging newfound knowledge with my existing expertise to craft a comprehensive solution
